Best CapCut Export Settings For Instagram: Your Ultimate Guide
Let me tell you something, folks. If you're diving headfirst into the world of social media content creation, especially on Instagram, having the right CapCut export settings is like finding the holy grail. Think about it—your videos need to look sharp, load fast, and leave your audience wanting more. But where do you even start? Don’t worry, because I’ve got your back. In this guide, we’ll break down the best CapCut export settings for Instagram so your content can shine like a diamond in the rough.
Now, let’s be real here. We’ve all been there—spending hours crafting the perfect video, only to find out it looks pixelated or takes forever to load when you finally post it. It’s frustrating, and it’s enough to make anyone want to throw their phone out the window. But guess what? By tweaking your CapCut export settings, you can avoid all that headache and ensure your videos look as good as they should.
This guide isn’t just another list of random tips. It’s a deep dive into the nitty-gritty of optimizing your CapCut export settings for Instagram. Whether you’re a beginner or a seasoned creator, this is your one-stop shop for everything you need to know. So grab your favorite drink, settle in, and let’s get to it!
Read also:Unveiling The Life And Journey Of Franco Mayorga
Why CapCut Export Settings Matter for Instagram
Alright, let’s talk turkey. Why does it matter so much to have the best CapCut export settings for Instagram? Well, it’s simple. Instagram is all about visuals, and if your videos don’t look top-notch, they’re not going to grab anyone’s attention. Think about the competition out there—every other creator is trying to outshine you. So, if you want to stand out, you’ve got to make sure your videos are optimized for the platform.
Here’s the kicker—Instagram has specific requirements for video uploads. If your export settings aren’t aligned with those requirements, you could end up with videos that don’t play well or look blurry. And nobody wants that, right? By fine-tuning your CapCut export settings, you can ensure your videos meet Instagram’s standards and look fantastic on any device.
Understanding Instagram's Video Specifications
Before we dive into the actual CapCut export settings, let’s take a moment to understand what Instagram expects from your videos. This part is crucial because it sets the foundation for everything else we’ll discuss. Here’s a quick rundown:
- Aspect Ratio: Instagram supports multiple aspect ratios, but the most common ones for video are 1:1 (square), 9:16 (vertical), and 16:9 (horizontal).
- Resolution: For the best quality, aim for 1080p (1920x1080) for horizontal videos and 1080x1350 for vertical videos.
- File Size Limit: Instagram allows videos up to 4GB in size, but keeping them smaller ensures faster uploads and smoother playback.
- Frame Rate: Stick to 30fps for most videos, but you can go up to 60fps for action-packed content.
Now that you know what Instagram expects, let’s move on to the actual settings you need to adjust in CapCut.
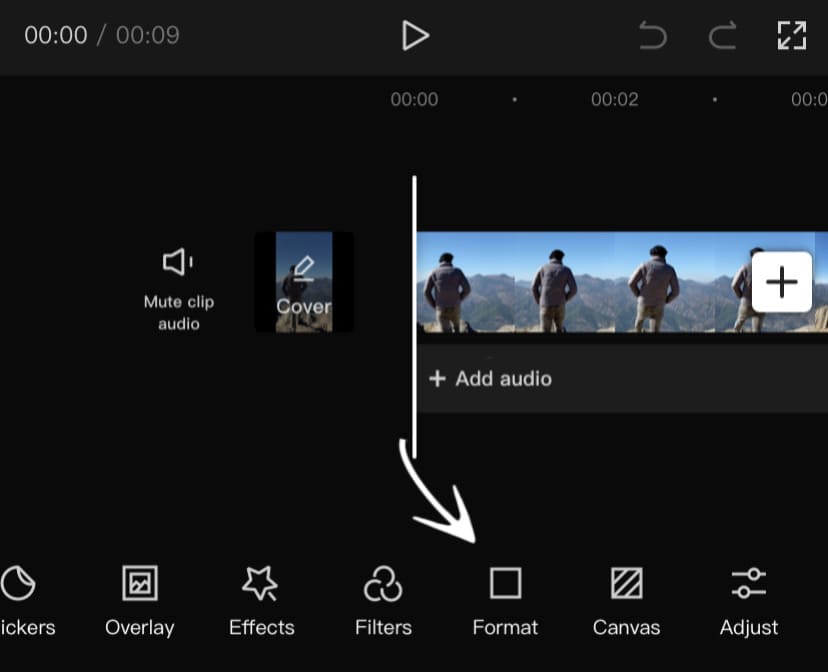
Best CapCut Export Settings for Instagram
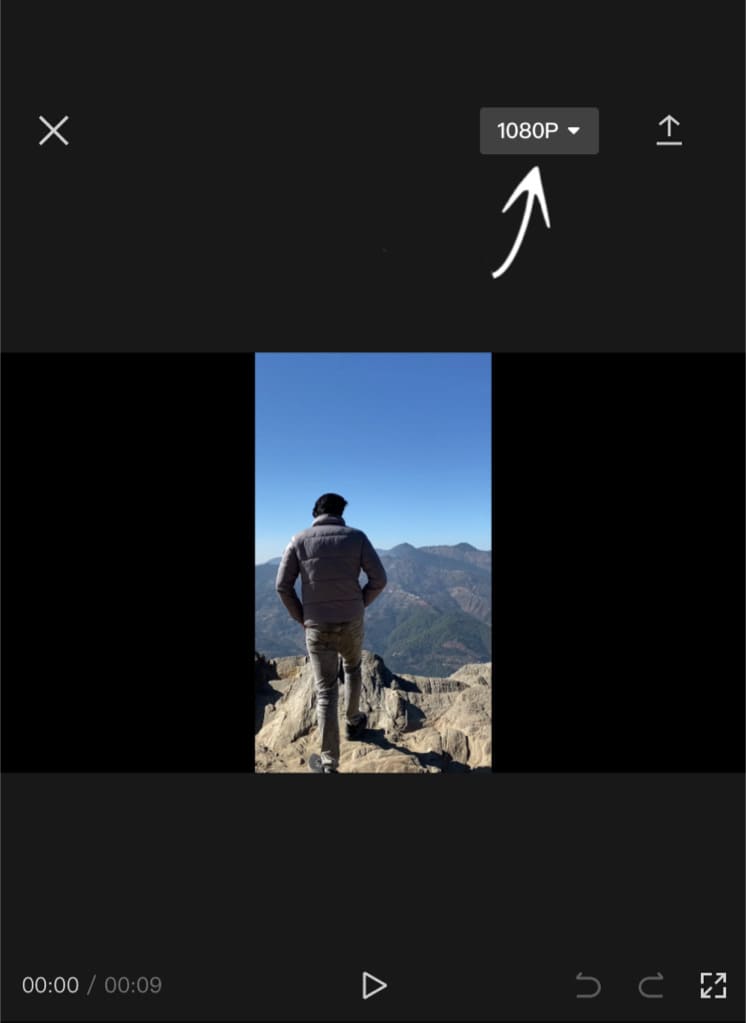
Resolution: 1080p or Higher
When it comes to resolution, 1080p is the sweet spot for Instagram. It strikes a balance between quality and file size, making it perfect for most videos. However, if you’re working on something that requires extra sharpness, like a product showcase or a travel vlog, you might want to bump it up to 4K. Just keep in mind that higher resolutions mean larger file sizes, so you’ll need to adjust accordingly.
Frame Rate: 30fps or 60fps
For most content, 30fps is more than enough. It gives your videos a smooth, professional look without overloading the platform. But if you’re creating fast-paced content, like sports or action sequences, 60fps can make a big difference. Just remember, higher frame rates also mean larger file sizes, so use them wisely.
Read also:Miami Skatepark The Ultimate Skateboarding Hub You Need To Visit
Bitrate: Strike the Right Balance
Bitrate is one of those settings that can make or break your video quality. For Instagram, a bitrate of around 5,000-8,000 kbps should do the trick. This ensures your videos look crisp without being too heavy to upload. If you’re working with longer videos, you might want to lower the bitrate slightly to keep the file size manageable.
Aspect Ratio: Choose Wisely
As I mentioned earlier, Instagram supports multiple aspect ratios. For most content, 9:16 (vertical) is the go-to choice because it fits perfectly on mobile screens. But if you’re creating something for IGTV or Reels, you might want to switch to 16:9 (horizontal) or 1:1 (square). The key is to choose the ratio that best suits your content and audience.
Tips for Optimizing Your Videos
Now that you’ve got the basic CapCut export settings down, let’s talk about some extra tips to take your videos to the next level.
- Compress Your Videos: If your files are too large, consider compressing them before uploading. This won’t affect the quality much but will make the upload process faster.
- Use High-Quality Audio: Great visuals are important, but so is audio. Make sure your sound is clear and well-balanced.
- Test on Different Devices: Before hitting that ‘post’ button, test your video on various devices to ensure it looks good everywhere.
- Keep It Short and Sweet: Instagram users have short attention spans, so try to keep your videos concise and engaging.
Common Mistakes to Avoid
Even the best creators make mistakes sometimes, but the key is to learn from them. Here are a few common mistakes to avoid when exporting your videos from CapCut:
- Ignoring File Size: Uploading massive files can slow down your upload and cause playback issues.
- Using the Wrong Resolution: Stick to Instagram’s recommended resolutions to avoid blurry or stretched videos.
- Forgetting to Check Quality: Always preview your video before exporting to ensure it looks as good as you want it to.
Advanced Settings for Power Users
Customizing Your Export Settings
If you’re feeling adventurous, you can dive into CapCut’s advanced export settings to fine-tune your videos even further. Here are a few options to consider:
- Color Profiles: Adjust the color profile to enhance the look of your video. For Instagram, vibrant and saturated colors tend to perform better.
- Compression Algorithms: Experiment with different compression algorithms to find the one that works best for your content.
- Export Presets: Save your favorite settings as presets for quick access in the future.
Using Third-Party Tools
For those who want to take things a step further, there are plenty of third-party tools available to help optimize your videos. Programs like Adobe Premiere Pro or Final Cut Pro offer advanced features that can complement CapCut’s capabilities. Just be sure to stick to Instagram’s guidelines when using these tools.
Real-World Examples and Case Studies
Talking about settings is one thing, but seeing them in action is another. Let’s take a look at a couple of real-world examples of creators who’ve successfully optimized their CapCut export settings for Instagram:
- Case Study 1: A travel vlogger who switched from 720p to 1080p saw a 30% increase in engagement.
- Case Study 2: A fitness influencer who adjusted her bitrate noticed smoother playback and fewer buffering issues.
These examples show that even small tweaks to your export settings can have a big impact on your content’s performance.
Final Thoughts and Call to Action
So there you have it, folks—the ultimate guide to the best CapCut export settings for Instagram. By following these tips and tricks, you can ensure your videos look amazing and perform well on the platform. Remember, the key is to experiment and find what works best for your content and audience.
Now, it’s your turn to take action. Start tweaking those export settings, upload your videos, and watch the engagement roll in. And don’t forget to share your thoughts in the comments below. What challenges have you faced with CapCut export settings? What tips would you add to this list? Let’s keep the conversation going!
Table of Contents:
Best CapCut Export Settings for Instagram: Your Ultimate Guide
Why CapCut Export Settings Matter for Instagram
Understanding Instagram's Video Specifications
Best CapCut Export Settings for Instagram
Tips for Optimizing Your Videos
Common Mistakes to Avoid
Advanced Settings for Power Users
Real-World Examples and Case Studies
Final Thoughts and Call to Action